This post outlines how I got the Discord discriminator that I wanted.
This process is old and is no longer required as Discord now allow you to change your discriminator via Discord Nitro.
What are discriminators?
Discord is a free modern voice and text chat application. Discord uses usernames to identify its users. However, instead of a username becoming unavailable after just 1 person uses it, Discord allows 9999 people to share the same username. It does this by using the combination of a name (unicode string) and a discriminator (4 digits) as a Discord tag. SomeUserName#1234 is an example of a Discord tag. This is a great idea (and more services should use it) as it allows many extra people to use their first name or a common alias as their username.
Each Discord account still has an underlying Discord user ID (i.e. 356005924638224307 ) that can is echo’d if you type in \@SomeUserName#1234 into any text channel. This is typically hidden from most users and used by developers when making plugins and bots.
Why do discriminators matter?
They don’t but just like usernames, discriminators are visible and thus can be considered to be a cosmetic name tag attached to your account. This is why people want specific Discord discriminators. Because it looks nice! User#0001 or User#1337 look a lot nicer than User#6519. For a long time, Discord has been strictly against scripts/bots which were designed to change a users Discriminator. This is because they believed the aesthetics of discriminators did not matter and their only purpose was to allow more people to share the same usernames. This statement was somewhat unfair given that almost all Discord devs had manually changed their discriminators!
Writing a Discord Discriminator Farmer
Back in mid 2017, I decided I wanted a new fancy Discord discriminator to replace my randomly generated one of 8471.
There is only one way to change your discriminator. Discord offer a name change feature in which you can change your username but not your discriminator. However, what happens if the username you want is already taken by someone with the same discriminator as you? Two users can’t have the same Discord tag. In this case, Discord changes your username (assuming all 9999 discriminator for that username aren’t taken) and then randomly generates a new discriminator for you!
This is the key behaviour that I used to write some python scripts to farm Discord discriminators.
Step 1: Gathering a list of usernames and discriminators
The first step in the process was to write a script ( get_discrim.py) to store a large number of Discord usernames and discriminators belonging to existing users. Recall that we needed to change our username to a new username that already had a user with our current discriminator. For example, if our Discord username was SomeUserName#6513 and a user existed called Tony#6513, we could change our username to Tony and because Tony#6513 already exists, Discord would generate a new random Discriminator for us.
Overall, this script was fairly simple to make. We simply made a new Discord account and joined a lot of guilds (aka servers) with very high member counts. We then uses the Discord API to return a list of all members in the guild that were currently online. By joining a few massive guilds like /r/Overwatch and /r/PUBATTLEGROUNDS, we had access to over 60000+ Discord tags which meant we had an existing username for 99% of discriminators. Our script stored the results as a dict which was dumped as a pickle so our second script could use it. This file was regenerated every 15 minutes to ensure we wouldn’t get stuck (in the rare case where our dump contained no matching usernames for a particular discriminator).
Step 2: Farming them Discriminators
The second script ( farm_web.py) would authenticate with Discord, load in our pickle from our first script and begin changing usernames. However, there was a problem. Discord initially allowed you to change your username as many times as you wanted. Then they restricted username changes to once per hour. Then once per two hours. Then once per day which is what the “secret” time window was when I was testing. This was to combat people doing exactly what I did. Now, given that I wanted a very small subset of target discriminators (22 total) out of a possible 9999, this would not do. As there was no way to get around this username change time limit I was forced to use multiple accounts and change each of their usernames daily.
|
1 2 |
def is_target_discrim(discrim): return discrim <= 10 or discrim in [1111,2222,3333,4444,5555,6666,7777,8888,9999,666,420,1337] |
This worked well initially before I ran into another issue. IP rate limiting. Discord would rate limit my servers IP address causing a lot of the username change API requests to fail. I overcame this quite easily by spanning out my name changes throughout the day rather than making them all at once.
|
1 2 |
# Spread out username changes over course of 1 day to avoid IP rate limiting time.sleep(86400 / len(accounts)) |
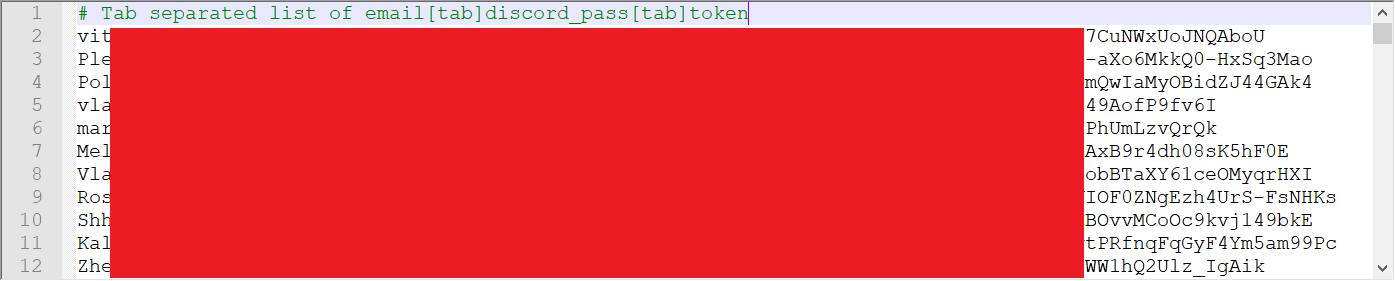
Another issue was the fact that each account needed an Authorization Token to authenticate with the API. I ended up manually fetching and storing the authorization tokens for all the accounts I used by logging into each account, filling in a captcha if one was presented and then retrieving the authorization token from the browsers local storage. As long as you did not log out, the authorization token remained valid indefinitely (this is why you can stay signed into the same Discord account forever on the same machine/browser).
Finally I was able to run my script successfully with about ~150 accounts at once. Meaning I had 150 new discriminators generated over a 24 hour period. Again, this isn’t a huge amount but it was enough to make bruteforcing feasible.
Once a name changed resulted in a new random discriminator that was in my target list, that thread would end and an entry would be written to my log file to alert me.
Step 3: One final name change
Over 2 weeks later running my scripts 24/7, I finally had 1 alert letting me know that a target discriminator was found. I really liked the result so I decided I would keep it and turn off my scripts. However, the account with the final discriminator did not have the username I wanted.
The final step involved changing the username to the username that I wanted to use. This part is important, you had to ensure the username you were changing your name to DID NOT have a discriminator that matched your new discriminator. Otherwise, Discord would just give you a randomly generated discriminator. This was easy enough, all you had to do was try to add a user via the friend system and see if the friend request was send successfully indicating the account existed or not indicating the account did not exist and it was safe to proceed. For example, if my final account with my target discriminator was RandomUserName#1337 and I wanted my tag to be MyName#1337, I would send a friend request to MyName#1337 to see if that tag existed. If it did not, I could proceed and get it for myself! Otherwise, you would unfortunately be out of luck.
Changes to Date
After I stopped running my scripts, Discord eventually increased the username change time window and enforced harsher IP rate limiting. Finally, they allowed users to change their discriminator via Discord Nitro although most of the good ones are probably taken by now.
Source Code
The source code for this project is available here:
https://github.com/mobeigi/Discord-Farmer